



















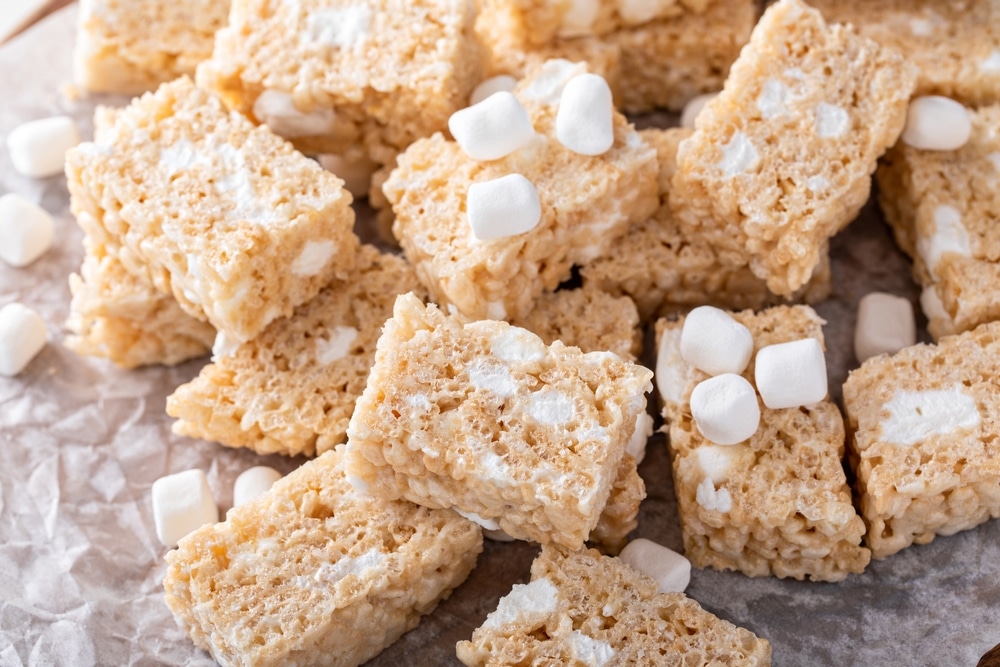
There is a profound sense of nostalgia tied to the simple pleasure of a gooey crispy rice square. For many of us, these treats were a childhood staple, though they often fall out of rotation as we become more conscious of what we put in our bodies. After years of avoiding the processed versions, I’ve found that a homemade, nutrient-dense take on this classic is exactly what my kitchen was missing.
Standard store-bought treats are often lackluster in flavor and disappointing in texture. More concerningly, they are usually loaded with high fructose corn syrup, GMO oils, and various artificial additives. Even traditional home recipes rely heavily on refined sugars. By making a few intentional swaps, you can recreate this favorite using whole-food ingredients that you can actually feel good about serving to your family.
A Conscious Upgrade to the Classic Crispy Treat
I am frequently asked how to adapt my homemade marshmallow recipe for these treats. While my family spent years focusing on grain-free healing, we have since reintroduced high-quality grains in moderation. This shift allowed me to experiment with creating a better version of the childhood square.
Balance is key, so rather than using conventional puffed rice which may be treated with glyphosate or fortified with synthetic vitamins, I opt for organic sprouted brown rice cereal. Sprouted grains are generally easier on the digestive system and offer a better nutritional profile. These cereals are typically non-GMO and lightly sweetened with coconut sugar, making them a much cleaner base for a family-friendly dessert.
Nutrient-Dense Marshmallows for a Healthier Base
The secret to these treats lies in the marshmallow component. Instead of refined white sugar, this recipe uses honey as a natural sweetener. It also incorporates grass-fed gelatin, which provides gut-supporting amino acids, and real marshmallow root for added soothing properties. Over time, I’ve experimented with adding elderberry or matcha to the marshmallows, but the base recipe is perfect for these cereal bars.
The process is straightforward: you don’t need to let the marshmallows set into firm cubes first. Once the mixture is whipped into a thick, glossy fluff, it is ready to be combined with melted butter and the crispy rice cereal, streamlining the entire preparation.
Simple Ways to Customize Your Homemade Squares
While these are delicious in their simplest form, there are several ways to elevate the flavor profile depending on your preference. My children love them as is, but a few small additions can transform them into a more gourmet dessert.
For a sophisticated sweet-and-salty combination, try finishing the top with a light dusting of flaky sea salt. You can also drizzle melted dark chocolate over the bars or press mini chocolate chips into the top while the mixture is still slightly warm. If you prefer a deeper, more complex flavor, consider browning the butter in your pot before adding the marshmallow fluff; this creates a rich, toasted caramel note that pairs beautifully with the honey.
Essential Ingredients for the Marshmallow Base
To begin, prepare a 9×13-inch baking dish by lining it with parchment paper. In a stand mixer, combine 1/2 cup of cold water with the gelatin, allowing it to bloom. Meanwhile, simmer a mixture of the remaining 1/2 cup of water, honey, and a pinch of sea salt in a small saucepan for about 7 to 8 minutes until it thickens into a syrup.
With the mixer on low, slowly incorporate the hot honey syrup into the gelatin. Increase the speed to high and whip for approximately 8 to 10 minutes. You are looking for a thick, marshmallow-like consistency. Add a splash of vanilla extract in the final minute of whipping.
While the mixer does its work, melt butter in a large pot over low heat. Once the marshmallow mixture is ready, stir it into the butter until smooth, then gently fold in your crispy rice cereal until every piece is coated. Press the mixture into your prepared pan using buttered hands or a sheet of parchment paper to prevent sticking. Allow them to set for at least 30 minutes before cutting.
Nutritional Overview (Per Square): Each serving contains approximately 135 calories, with 26g of carbohydrates and 2g of protein. These treats also provide a small boost of Vitamin A and Iron, making them a more functional choice than traditional processed snacks.
Best Practices for Storing and Enjoying Your Treats
These homemade treats are best enjoyed at room temperature. To maintain their texture, store them in an airtight container where they will remain fresh for 4 to 5 days. Because they lack the preservatives found in store-bought options, they are most delicious when eaten within the first few days—though in most busy households, they rarely last that long.
Takeaway for the Modern Mother
Transitioning to healthier versions of family favorites doesn’t mean sacrificing the joy of a classic treat. By choosing sprouted grains, natural sweeteners like honey, and gut-friendly gelatin, you can provide a nostalgic experience that aligns with your wellness goals. Whether you stick to the original recipe or experiment with dark chocolate and sea salt, these treats prove that simple, high-quality ingredients make all the difference.